
A trip can create hundreds of memorable photographs. You may capture famous landmarks, quiet streets, local food, beautiful landscapes, and spontaneous moments with friends or family. However, even the best travel photos often contain distractions. A stranger may walk in front of a monument, a parked car may block part of a view, or a trash bin may appear in an otherwise beautiful street scene.
These details are normal in travel photography, but they can reduce the impact of an image. Fortunately, you do not need to delete a good photo simply because something unwanted appears in the background. With simple editing tools, you can clean up many common distractions while keeping the original feeling of the trip.
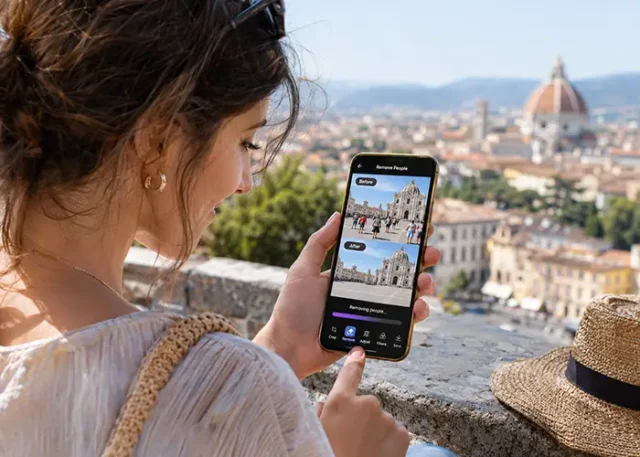
One useful option is to easily remove person from photo when an unfamiliar tourist, passerby, or accidental subject takes attention away from the main scene. The best edits are usually simple and natural. The goal is to improve the image while preserving the atmosphere, lighting, and story of the moment.
Review Your Photos Before Editing
The first step is organizing your travel photos. After a trip, it is tempting to edit everything immediately, but reviewing your collection first will save time. Remove blurry images, duplicates, accidental screenshots, and photographs that do not contain useful information.
Create a small selection of your strongest pictures. Look for images with:
- A clear subject
- Good lighting
- A strong composition
- Interesting colors
- A meaningful memory
- Enough resolution for editing
Do not choose a photo only because it shows a famous place. A simple image of a café, street corner, or local market may be more interesting than a crowded landmark photograph.
Once you have chosen the best images, make backup copies. Keep the original files unchanged so you can return to them later. Work on duplicate versions or use an editor that preserves the original image.
Identify Distracting Objects
Not every object in a photo needs to be removed. Some people, vehicles, and signs help communicate the location and atmosphere. A busy square may look natural with a few people in it. Removing everyone could make the image look artificial.
Before editing, ask whether the object is truly distracting. Common items that may be worth removing include:
- A person standing directly in front of the subject
- A stranger looking at the camera
- A photographer accidentally reflected in glass
- A large trash bin
- A traffic sign covering an architectural detail
- A parked scooter or car in an empty composition
- Wires, temporary barriers, or construction equipment
- Bright objects that pull attention away from the main subject
Keep elements that contribute to the story. A local vendor, cyclist, or group of pedestrians may make a travel photograph feel more authentic.
Remove People Carefully
People are among the most common distractions in tourist photos. Popular attractions are often crowded, so it may be impossible to capture a completely empty scene. Removing one or two accidental subjects can make the main landmark easier to see.
Start by identifying the person’s position and size. A small person in the distance is usually easier to remove than someone standing close to the camera. The background also matters. A person against a plain wall, pavement, or sky can often be removed cleanly. A person covering detailed railings, artwork, or patterned tiles may require more careful work.
After removal, inspect the area around the edit. Look for repeated textures, broken lines, unusual shadows, or duplicated objects. If the result looks too smooth or artificial, reduce the editing area or use a manual correction tool.
Do not remove people if doing so changes the meaning of the photograph. In some travel images, local residents or other visitors are part of the cultural context. Editing should improve the composition, not erase the identity of a place.
Fix Background Clutter
Travel locations often contain small items that were not visible when you took the picture. Signs, cables, bins, cones, and temporary fences can make a beautiful image feel untidy.
When cleaning up background clutter, work from the largest distraction to the smallest. Removing one large object may already make the image look much better. Avoid editing every tiny detail, because excessive retouching can make the image feel unnatural.
Pay attention to straight lines. Buildings, roads, bridges, and walls often contain strong geometric patterns. If you remove an object near these lines, make sure the lines continue smoothly. A bent railing or broken pavement pattern can be more noticeable than the original distraction.
Reflections require extra care. If a window or polished surface contains an unwanted object, the reflection may continue into nearby areas. The edited result should match the direction and brightness of the surrounding reflection.
Improve Cropping and Composition
Sometimes the easiest way to clean up a tourist photo is to crop it. Cropping can remove objects at the edge of the frame and make the main subject more prominent. It also helps adapt a photo for different platforms.
Try several compositions:
- A wide crop for a website banner
- A square crop for a social media post
- A vertical crop for a mobile story
- A tighter crop for a profile image
- A panoramic crop for a travel album cover
When cropping, avoid cutting through important architectural features, faces, or natural lines. Leave enough space around the main subject so the image does not feel cramped.
The rule of thirds can help create balance. Place the main subject slightly off center, then use the surrounding landscape or architecture to guide the viewer’s eye. A small crop can often improve a photo more than a complicated edit.
Correct Brightness and Color
A clean image can still look weak if the exposure or color is inaccurate. Travel photos are often taken in difficult lighting, including strong sunlight, deep shadows, indoor darkness, or changing weather.
Begin with small adjustments:
- Increase exposure if the image is too dark.
- Reduce highlights if the sky is too bright.
- Lift shadows to reveal details.
- Adjust contrast to add depth.
- Correct white balance if colors look too warm or too cool.
- Increase saturation carefully.
- Add sharpness only when needed.
Avoid making the sky unnaturally blue or the colors excessively bright. A strong edit should look believable. Compare the adjusted image with the original and take breaks between edits. Looking at the same picture for too long can make extreme changes seem normal.
Different locations may benefit from different color treatments. Warm tones can suit a sunset or historic street, while cooler tones may work well for mountains, beaches, or modern architecture. The best style depends on the mood you want to preserve.
Keep Skin and Faces Natural
If your travel photo includes you, friends, or family, pay attention to faces after removing nearby objects. Editing tools may accidentally blur hair, change facial features, or create unusual skin textures.
Make corrections in small areas and zoom out regularly. A face that looks acceptable at high magnification may appear strange at normal viewing size. Avoid excessive smoothing, especially in photos meant to preserve personal memories.
When removing a person who overlaps with someone you want to keep, work slowly around the edges. Check hair, hands, clothing, and shadows. A small mistake near a person can be more visible than a larger mistake in the background.
Preserve the Sense of Place
Travel photographs are valuable because they show where you were and what the place felt like. Editing should support that sense of place.
Keep local details such as:
- Street signs that identify the location
- Traditional architecture
- Local transportation
- Regional plants and landscape
- Markets and storefronts
- Natural crowds and movement
- Weather and seasonal conditions
Removing too much can create a scene that never existed. A quiet monument may look attractive, but it may not represent the real experience of visiting a busy city. Consider saving two versions: one clean version for a portfolio or printed album, and one lightly edited version that preserves more of the original atmosphere.
Use Editing Tools Responsibly
Image editing is useful, but it should be used honestly. For personal albums, creative projects, and social posts, removing small distractions is generally harmless. For news, documentary work, historical records, or commercial claims, major alterations may be misleading.
If a photograph is being used to represent a real location, do not remove important information that changes the viewer’s understanding. For example, removing construction equipment from a current development site may make the project appear further along than it is.
Keep track of edited files and original files. Clear file names such as “Rome-square-original” and “Rome-square-cleaned” make it easier to identify which version you are viewing.
Export the Right File
After editing, export the image according to its final use. A high-resolution file is useful for printing, while a smaller compressed version may load faster on a website.
Before saving, check:
- Image dimensions
- File format
- Compression quality
- Color appearance
- Remaining distractions
- Cropping and alignment
- Text or watermark placement
View the final image on more than one screen if possible. An edit that looks subtle on a large monitor may look obvious on a phone. Also check the image at normal size, not only while zoomed in.
Keep a high-quality master file and create smaller copies for sharing. This allows you to make future versions without repeatedly compressing the same image.
Build a Simple Travel Editing Routine
A practical routine can make photo cleanup less overwhelming:
- Back up your travel photos.
- Select the strongest images.
- Remove duplicates and blurry files.
- Identify major distractions.
- Crop the image if necessary.
- Remove unwanted people or objects.
- Correct light and color.
- Check faces, lines, and textures.
- Export the appropriate version.
- Save both the original and edited file.
You do not need to edit every photograph. Choose the images that you plan to print, publish, frame, or share with others. A small collection of carefully prepared photos is often more valuable than a large folder of unfinished images.
Final Thoughts
Cleaning up tourist photos after a trip can help your best memories stand out. Simple edits can remove an accidental passerby, reduce background clutter, improve composition, and correct difficult lighting. The most successful results remain natural and preserve the character of the location.
Start with the strongest images, make small changes, and review every edit carefully. Keep the originals, protect meaningful local details, and avoid changing the story of the scene. With a thoughtful editing process, ordinary travel snapshots can become polished photographs that still feel connected to the real experience.