Travel videos aren’t merely souvenirs. They’re a great way to share experiences, evoke wanderlust, and bring the world closer to viewers in a way no other medium can.
While travel videos do sound exciting, the process of making them can be rather tricky, especially for a beginner. But fear not, we’ve collected some best travel video ideas and tips to make the job easier for you.
Things to Consider While Creating Travel Videos
It doesn’t matter if you’re traveling all around Europe with a big group of friends or planning a solo trip. All travel videos require a certain approach.
Before we discuss the video creation process itself, let’s take a look at some important things you should keep in mind.
Define Your Purpose and Audience
The first thing you need to think about is the purpose of your video. Do you just want to film your adventures and keep them as a reminder of your traveling experience? Or, perhaps, you’re a travel vlogger who entertains, educates, or inspires their audience by sharing travel content online.
For the latter, the audience consideration is just as important as purpose. Young people who haven’t traveled much yet might be interested in practically any content: from interesting facts to stunning views.
Experienced travelers, on the other hand, are more difficult to impress. You might want to share unusual locations or provide honest reviews on accommodation or other important things.
Prioritize Storytelling Over Shots
It’s okay if you just want to showcase fascinating corners of the world, but storytelling is always more attractive than random scenes.
Your story could follow a theme, such as exploring local cuisine, or a narrative like a challenging trek to a mountain summit. Strong storytelling doesn’t require a big budget, just a clear idea of what you want to convey.
Music and Sound Design
Audio often gets overlooked, but sound can be just as important as visuals.
Background music sets the tone and rhythm of your video, guiding viewers through different segments. Ambient sounds, like birds chirping or waves crashing, add authenticity to your video, transporting the viewer directly into the scene. So make sure to capture those sounds, too.
If you plan to add a voiceover, invest in a good microphone to capture clear, quality audio, which is especially important for those running a travel vlog.
Choose Editing Software that Matches Your Skills and Needs
You obviously can choose an editor later when all the footage has been filmed. But we recommend thinking about it beforehand.
If you know what your software can do and what tools and features it offers, you’ll be able to film accordingly. For example, if the program of your choice provides the picture-in-picture effect, you can shoot two (or more) scenes that would look good on top of each other.
Your skills also play a significant role. For beginners, it’s a good idea to go for software with an intuitive interface and various presets and templates. For experienced users, it’s better to choose an editor that offers advanced features, such as motion tracking, for example.
If you’re on a budget, try searching for free video editing options. You can browse for something like “video editor free download” and choose a program that suits your needs.
5 Travel Video Production Tips
Let’s also discuss some tips that might help you create the most stunning and entertaining travel videos.
1. Plan but Stay Flexible
Pre-trip planning helps you get the shots you want without feeling overwhelmed. Research your destination, noting key spots and events to capture.
However, stay adaptable to the unexpected — a street performer, an impromptu local festival, or a breathtaking sunset. These spontaneous moments often add authenticity and character to travel videos.
2. Vary Your Shots for a Dynamic Look
A good travel video combines different shot types. Don’t just rely on one of them, add some diversity.
For example, you can use drone footage for unique aerial views that provide a fresh perspective on well-known landmarks. That is, if you own a drone or are willing to purchase one, of course.
By mixing shot types, you create visual interest, making the video more enjoyable for viewers.
3. Use Natural Lighting
There’s no option that can be as good as natural lighting, so try to use it as much as possible.
The “golden hour” provides soft, warm light ideal for shooting landscapes or people. Avoid harsh midday sunlight, as it can create unflattering shadows.
When shooting indoors or at night, stabilize your camera to reduce graininess or invest in a small portable light to improve visibility.
4. Capture Genuine Moments
Scripted videos have their place, but in travel videos, candid interactions and unscripted moments bring out the unique spirit of each location.
Capture spontaneous conversations, laughter, or even small challenges. These moments resonate with viewers, making the experience feel more real.
5. Experiment with Angles and Perspectives
Don’t shy away from exploring different shot angles and perspectives, such as shooting from ground level to make subjects appear larger or shooting top-down to highlight interesting layouts.
Movement, like panning, tilting, or tracking shots, gives viewers a sense of “being there” as the scene unfolds.
10-Step Guide on Making a Travel Video
We’ve finally reached the best part — a guide that will help you create a travel video.
Step 1: Pre-Planning
As we’ve mentioned, planning is crucial for a successful travel video.
Research the destination, make a list of key landmarks or cultural sites, and sketch a rough outline of your story. Think about the type of travel video you want to create. Is it a “best-of” highlights reel, a food-focused journey, or a narrative-driven adventure?
Planning doesn’t mean scripting every shot. It means having a roadmap to help you stay on track and capture all the necessary scenes.
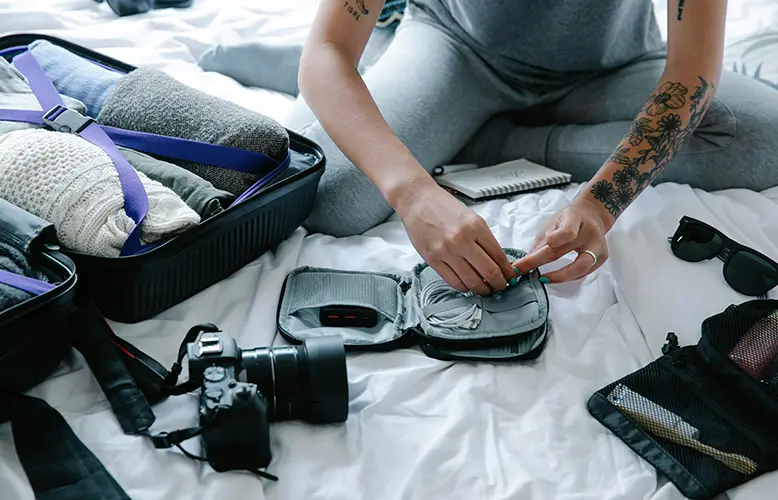
Step 2: Setting Up the Right Equipment
We might’ve scared you by mentioning drones, but the truth is, excellent travel videos can be made with minimal equipment.
For beginners, a smartphone with a good camera, tripod or stabilizer, and a few lens attachments can do wonders.
More advanced creators may want to invest in a mirrorless camera, a quality microphone, and even the aforementioned drone for aerial shots.
Step 3: Capturing B-Roll Footage
B-roll footage is essential for providing context and smooth transitions between scenes. Think of B-roll as “texture shots” that show the surroundings, people, or smaller details that add depth to your story.
Record shots of local life, street scenes, and quirky details, like a cat lounging in the sun or a chef preparing food. These clips may seem minor, but they are perfect for creating an immersive travel video.
Step 4: Filming Key Moments
Aim to capture specific, memorable moments, such as sunrise over the mountains or an encounter with a local guide.
Avoid overusing zoom features. Wide shots often look best for capturing scenic landscapes or the scale of a busy market. Keep these moments short but impactful and provide your viewers with a series of visual “highlights” that tell the story of your journey.
Step 5: Incorporating Yourself in the Story
Adding yourself to the video, especially if it’s a vlog, makes the experience more personal.
Speak directly to your audience, make jokes, share your thoughts or anecdotes, and don’t be scared to show your true personality. All of that will help the viewers feel involved and connected.
After all, there’s plenty of travel content online, but there’s no person like you. If viewers like your personality, they’ll stay loyal to your content.
Step 6: Organizing Your Footage
After filming, review and organize your footage. Think which scenes work best for each part based on your storyline.
You may create multiple folders on your device to make it easier for you to find specific moments.
Step 7: Editing the Video
Start by trimming your clips, arranging them in sequence, and adding transitions. Adjust color levels to match the mood of each scene — vibrant tones for tropical scenes, muted colors for historical sites, and so on.
Experiment with overlays like maps, titles, or captions, which can add context and guide viewers through your story.
And going back to organizing your footage: if your editing software allows you to color-code layers, don’t forget to use this feature.
Step 8: Adding Music and Voiceovers
Music is not just an option for travel videos, it’s practically a must. Choose tunes that align with the feel of each scene and avoid overly dramatic tracks.
If you plan to share your video on social media, don’t forget about copyright. Check whether a song of your choice can be used without getting your video blocked or your account banned.
You can also use royalty-free libraries to find music that you can use in your content safely.
Step 9: Exporting in High Quality
Once you’re satisfied with everything, it’s time to export the video.
Choose the highest quality (or at least 1080p) that your editing software offers, and render the project. The good news is, many video editors provide video output templates that save you from adjusting everything manually.
It’s always safe to go for MP4 since it’s a universally supported format, and you’ll hardly encounter any difficulties while trying to post your video online.
Step 10: Sharing Your Video
Platforms like YouTube and Instagram allow for tags, descriptions, and thumbnails that help attract viewers.
Use an eye-catching thumbnail and descriptive title that reflects your video’s theme. Avoid clickbait, though, as it will only frustrate the audience.
And don’t forget about SEO: add relevant keywords to your video description to make it easily discoverable.
The Bottom Line
Creating a travel video is an adventure in itself. But this adventure requires a lot of thought and effort.
Start with careful planning and research, decide on the places you’d like to visit and show in your videos. Think about equipment and other tools you might need. Try to capture the spirit of the place you’re visiting so that your viewers will feel like they’re traveling with you. And don’t forget about editing, of course, since it’s the way to turn your footage into an unforgettable experience.


