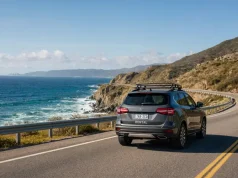


Packing a car for a road trip can feel like solving a puzzle. Every suitcase, cooler, stroller, camping chair, and overnight bag needs a place, but fitting everything into the vehicle is only part of the challenge. Gear must also be organized so passengers remain comfortable, important items are accessible, and nothing becomes dangerous during sudden braking.
When interior space runs out, a rooftop cargo box, soft-sided carrier, or basket can add useful capacity. That does not mean everything that fits on the roof belongs there. Heavy objects are usually safer inside the vehicle, while lighter and bulkier items are better candidates for rooftop storage.
Here is how to decide what should stay inside the car, what can go on the roof, and which organizing products can make the journey easier.
Start With Safety, Not Available Space
Before packing, check the vehicle owner’s manual for its payload and roof-load limits. The maximum roof load is not determined by the cargo box alone. It may be restricted by the vehicle, mounting towers, crossbars, cargo rack, or carrier.
Use the lowest stated limit among all components and remember that the weight of the crossbars, basket, or cargo box counts toward the total roof load.
The vehicle’s overall payload also matters. Passengers, luggage, coolers, accessories, and rooftop cargo all add weight. Consult the owner’s manual and the vehicle information label rather than estimating how much the car can carry.
The National Highway Traffic Safety Administration recommends tying cargo down with appropriate straps or netting, avoiding excessive loads, and double-checking that everything is secure before driving.
What Should Be Packed Inside the Car?
The interior is generally the best location for heavy, valuable, fragile, frequently used, or weather-sensitive belongings.
Items that should normally remain inside include:
- Passports, wallets and travel documents
- Medications
- Phones, cameras and laptop computers
- Food and drinks needed during the drive
- Emergency and first-aid supplies
- Heavy coolers
- Dense camping equipment
- Overnight bags
- Children’s essentials
- Pet supplies
- Fragile or valuable belongings
Keeping an item inside does not automatically make it safe. Loose water bottles, tools, cameras, and other hard objects can move through the cabin during sudden braking or a collision. Store them in closed compartments or secure organizers whenever possible.
Avoid stacking luggage so high that it blocks the driver’s rearward view. In SUVs, hatchbacks, and station wagons, cargo should generally remain below the top of the rear seat unless the vehicle has an appropriate cargo barrier or another manufacturer-approved restraint system.
Place Heavy Gear Low and Secure It
Weight distribution affects how a vehicle handles. Heavy objects should be placed as low as possible and close to the center of the vehicle rather than stacked against the rear hatch or placed on the roof.
Start with the heaviest suitcases, storage bins, cooler, and camping equipment. Position them on the cargo floor and prevent them from sliding. Lighter bags can then be packed around or on top of them, provided the arrangement remains stable.
Do not bury emergency supplies beneath everything else. A flashlight, first-aid kit, tire inflator, warning triangles, basic tools, water, and roadside-assistance information should be reachable without completely unloading the vehicle.
For more help deciding what belongs in the car, see DRIFT Travel’s guide to packing essentials for a road trip.
Use Zones to Organize the Interior
Rather than filling every available opening with an unrelated item, divide the vehicle into storage zones.
The Driver Zone
Keep this area uncluttered. Sunglasses, charging cables, parking cards, and other small necessities can go in the center console or another secure compartment. Nothing should interfere with the pedals, shifter, steering wheel, or airbags.
The Passenger Zone
Passengers should have enough space to sit normally with their seat belts properly positioned. Keep snacks, water, entertainment, tissues, and charging cables within easy reach, but do not allow loose items to accumulate on seats or the floor.
A seatback organizer can be helpful for families, particularly when it gives children a designated place for books, headphones, snacks, and small toys.
The Cargo Zone
Use this area for suitcases, equipment, and supplies that will not be needed while the vehicle is moving. Grouping similar items makes unloading easier and reduces the likelihood of unpacking the entire car to find one object.
A collapsible organizer such as the Drive Auto car trunk organizer can hold groceries, shoes, cleaning supplies, pet gear, or roadside equipment. Its adjustable compartments and tie-down straps help prevent small items from sliding around the cargo area.
Vehicles with limited floor space may benefit from a hanging organizer such as the Drive Auto seatback and trunk organizer. This style uses otherwise wasted vertical space and keeps smaller items separate from luggage.
The Overnight Zone
If the trip includes a hotel stop before the final destination, pack one overnight bag for the entire group. Include sleepwear, toiletries, medications, chargers, and a change of clothing.
Keeping this bag near the rear of the cargo area prevents everyone from carrying full suitcases into the hotel for a single night.
When Does Rooftop Storage Make Sense?
Rooftop storage can be valuable when the interior is full but the trip still requires bulky gear. It is particularly useful for family vacations, camping trips, ski trips, and longer journeys in smaller vehicles.
Good candidates for the roof include:
- Sleeping bags
- Tents
- Folding chairs
- Soft duffel bags
- Bedding
- Clothing
- Beach equipment
- Other lightweight, bulky items
Avoid using the roof for heavy coolers, loose equipment, electronics, valuables, items that could leak, or anything that may be damaged by heat, moisture, vibration, or sudden temperature changes.
Moving cargo to the roof raises the vehicle’s center of gravity and may affect steering, braking, fuel consumption, and sensitivity to crosswinds. Drive conservatively and expect the vehicle to behave differently, especially during turns and highway lane changes.
Hard Cargo Box or Soft Rooftop Bag?
The two most common enclosed rooftop storage options are hard-shell boxes and soft-sided bags. Each serves a different type of traveler.
Hard-Shell Cargo Boxes
A hard cargo box offers strong weather protection, a defined shape, and better resistance to casual theft. It is generally the better choice for travelers who take frequent road trips or carry skis and other long equipment.
Hard boxes usually require compatible crossbars. They also cost more, require storage space when not in use, and add height to the vehicle.
The Thule Pulse 2 rooftop cargo box is one example of a reusable hard-shell system. Before ordering any roof box, confirm its mounting compatibility, exterior dimensions, hatch clearance, and effect on antenna or sunroof operation.
Soft-Sided Rooftop Carriers
A soft carrier is usually less expensive and can be folded for storage between trips. Some models attach to vehicles with or without an existing roof rack.
The Rightline Gear Sport 3 rooftop cargo carrier offers a soft-sided alternative for travelers who need occasional extra capacity. It is designed to attach with or without a roof rack, but buyers should still confirm that the installation method is permitted for their particular vehicle.
Another option is the RoofPax expandable rooftop cargo carrier, which is sold with accessories including a protective mat, straps, door hooks, and a luggage lock.
Even when a carrier is described as waterproof or weatherproof, place clothing and other moisture-sensitive belongings in sealed bags or waterproof packing cubes. Zippers, seams, installation errors, and severe weather can still allow water to reach the contents.
How to Load Rooftop Cargo Properly
Lay out everything before lifting it onto the vehicle. Rooftop cargo should be balanced from side to side, with the weight spread across the supported portion of the rack or carrier.
Follow these basic principles:
- Keep the roof load well below the vehicle’s maximum limit.
- Include the weight of the rack, crossbars, box, or bag in the calculation.
- Place lighter items on the roof and heavier cargo inside the vehicle.
- Distribute weight evenly rather than concentrating it at one end.
- Close and secure every zipper, latch, buckle, and mounting point.
- Tuck away loose strap ends so they cannot flap against the vehicle.
- Make sure the load does not obstruct lights or extend dangerously beyond the vehicle.
- Follow the carrier manufacturer’s installation instructions exactly.
A set of appropriately rated tie-downs, such as Rhino USA ratchet straps, can be useful for compatible cargo racks and other approved applications. Ratchet straps should not replace a cargo box’s original mounting hardware, and overtightening can damage equipment or the vehicle. Use only the attachment points and strap arrangement specified by the rack or carrier manufacturer.
Elastic bungee cords should not be the primary restraint for rooftop cargo. They can stretch, shift, or release under load.
Recheck the Load After You Start Driving
Stop after the first short portion of the journey to inspect the carrier, straps, mounting hardware, and contents. Loads can settle once the vehicle begins moving, allowing previously tight straps to loosen.
Check the roof again after driving on rough roads, encountering strong wind or rain, and at every fuel or meal stop. Listen for new rattling, whistling, or flapping sounds, which may indicate that something has shifted.
If the load looks uneven or a strap is loose, pull over in a safe location before attempting to correct it.
Remember the Vehicle’s New Height
A rooftop carrier can make an SUV or crossover substantially taller. Measure the vehicle after loading and keep the total height available to the driver.
Pay particular attention when entering:
- Parking garages
- Hotel entrances
- Ferry decks
- Car washes
- Drive-through lanes
- Residential garages
- Areas with low branches or overhead barriers
A note placed near the dashboard can provide a useful reminder. Roof boxes are frequently damaged not on the highway, but when drivers forget they are installed and enter a low-clearance area.
Remove the carrier when it is no longer needed. An empty rack, box, or bag can still create wind noise, affect efficiency, and add unnecessary height.
Keep Essentials Accessible
The best packing arrangement is not simply the one that fits the most equipment. It should also allow travelers to reach what they need without unloading at the side of the road.
Keep these items inside and accessible:
- Identification and travel documents
- Medications
- Water and snacks
- Phone chargers
- Weather-appropriate clothing
- Children’s supplies
- Pet necessities
- First-aid equipment
- Flashlight
- Roadside emergency supplies
- One small bag for unexpected delays
Anything required during the drive should not be locked inside a roof box or buried under heavy suitcases.
Families planning a longer drive can find additional ideas in DRIFT Travel’s guide to planning a first family road trip.
Inside the Car or on the Roof?
A simple rule can make most packing decisions easier:
Heavy, valuable, fragile, frequently needed, or weather-sensitive items belong inside the vehicle. Lightweight, bulky, durable, and infrequently needed gear may be suitable for the roof.
Choose interior storage whenever everything fits safely without obstructing passengers, seat belts, airbags, or the driver’s view. Add rooftop storage when it provides genuinely useful space and the vehicle is properly equipped to carry it.
The final goal is not to fill every cubic inch. It is to create a balanced, secure, and organized vehicle that remains comfortable and predictable on the road.
Final Road-Trip Packing Checklist
Before leaving, confirm that:
- The vehicle is within its payload and roof-load limits.
- Heavy equipment is positioned low and secured.
- Passengers have adequate space and unobstructed seat belts.
- The driver has clear visibility.
- Emergency supplies are easy to reach.
- Rooftop cargo is evenly distributed.
- All mounts, latches, straps, and zippers are secure.
- Loose strap ends have been tied away.
- The loaded vehicle’s height is known.
- Roof attachments will be checked regularly during the trip.
Thoughtful organization makes more than a cosmetic difference. It protects passengers, reduces distractions, makes overnight stops easier, and lets everyone begin the road trip with enough space to enjoy the journey.